WiFi Autoconnect with Arduino and ESP8266/ESP32
WiFi Autoconnect and Web application builder project contains Arduino ESP32 WiFi autoconnect and Arduino ESP12/ESP8266 WiFi autoconnect
The source code contains 3 files:
- ESP32WiFiAutoConnect.ino – the main program (or ESP8266WiFiAutoConnect.ino)
- AC.ino (autoconnect handler)
- AC.h (configuration headerfile)
First open one of the files with Arduino program, then set the settings as the following image (Board, CPU Frequency And Flash Frequency)
- The compiler of software must be set on ESP32 (or similar) before doing anything.
Then put the ESP32 module on the “download mode” and upload the program.
After upload run the program in “normal mode”.
Then in case you are using ESP32-Cam, the red LED on the board would be turned on for 1 second then turns off. Then you’ll be able to see the module’s hot spot ssid via the WiFi networks in your PC or smart phone.
The default SSID is WiCardAC and the default password is 12345678. Connect and go to 192.168.4.1/config with a web browser.
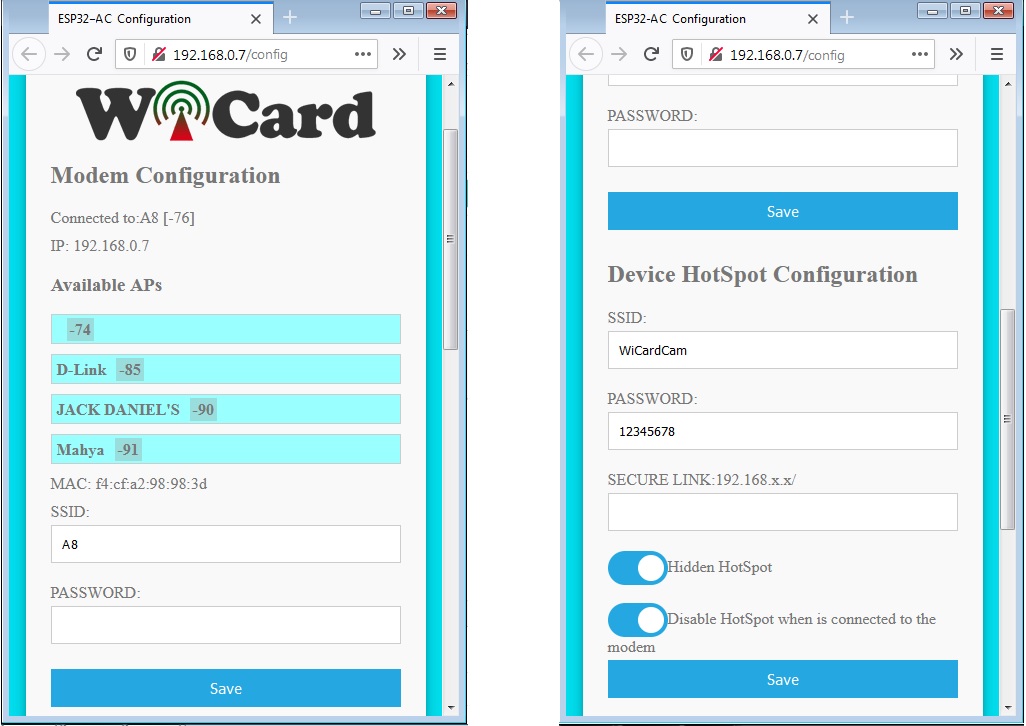
The WiFi autoconnect configuration page
In the “Modem Configuration” section, you’re able to view/edit the SSID and password of WiFi modem/router and then click on “Save” after inserting. The module would connect to the modem after about 30 seconds in case of validity of ssid and password.
- This page is also available via the DHCP IP of the module.
In the “Device Hot Spot Configuration“ section, you can set the module hotspot’s SSID and password. Also you can set a password for the internal page with Secure Link section. (Example: the secure link is ABCD and the root page would be at 192.168.4.1/ABCD/ address)
The “Hidden HotSpot” button will set the module’s hot spot as hidden hotspot and the “Disable HotSpot when is connected to the modem” would disable the module’s hotspot, when is connected to the modem.
Programming manual
In the ESP32WiFiAutoConnect.ino file, search for “Your Setup code”. in this section you can place the initial code of your program.
Search for “Your loop code”, in this section you can place your loop program, which executes thousands time in a second.
In the AC.ino file, search for “Your EEprom init”. in this section you can set the initial values for EEprom memory.
Search for “Your config” to place your custom setting in the configuration page (The format must be HTML).
In the AC.h file, removing “#define LOG_ENABLE”, disables the logs. Also it releases log memory.
With add or remove “#define UPDATE_IP” you can enable or disable the server connection option.
The “LOOP_10_S” value set the printing “-” In the log time. The best time is 10 seconds and set according to your module CPU frequency.
The codes are available in the following:

Written by: M. Mahdi K. Kanan – Full stack electronics and programming engineer and the founder of WiCardTech